Hello, Shiny! Part I
Daniel N. Albohn
12/06/2017
Introduction
The goal of this tutorial is to orient you to the different parts of a shiny app, how each part is structured, and some basic shiny commands/functions. In the first part, we will build our UI and server. In the second part, we will personalize the app by allowing for user input that changes the output.
Hello, Shiny! What makes you special?
Shiny UI and Server
Each shiny app consists of a UI (user interface), or what the user actually sees on the screen, and a server, or how each app should be run. In older versions of shiny, these had to be separate, consisting of a UI.R and a server.R files. Since shiny v0.10.2, these can now be combined into a single file, app.R. All app.R files will consist of the following structure:
library(shiny)

ui <- fluidPage(
  ## Build what the person sees in the app here
)

server <- function(input, output) {
  ## Build how the app should react to the user/page here
}
Each shiny applications ends with a call to let R know that this is an interactive shiny document with a UI and server. Just add shiny::shinyApp(ui=ui, server=server) to the end of the app.R script.
library(shiny)

ui <- fluidPage(
  ## Build what the person sees in the app here
)

server <- function(input, output) {
  ## Build how the app should react to the user/page here
}

shiny::shinyApp(ui=ui, server=server)
Running the app
After you save the document as app.R, and if you are using RStudio, you should see a button in the top right corner to run the app.

Clicking this starts the app locally. This approach to running the app is good for debugging and checking how any changes effected your app immediately.
A caveat: Because shiny only recognizes certain file names (UI.R, server.R, and app.R), each new shiny application needs to be in its own directory. You can run an app from outside an interactive session by pointing shiny to the directory that the app is contained in:
library(shiny)
runApp("R/shiny_tutorial/hello_shiny/")
Hello, shiny! How do I build you?
Even though both the UI and the server are in one file, for the purposes of this first walkthrough I am going to break them down into their separate components. Just know that both of them should exist in the same app.R file.
User Interface
The first thing we want to define is a page. The fluidPage() argument is nice because it automatically defines the boundaries of the page based on the dimensions of current computer screen, as well as if the user changes the size of the window.
ui <- fluidPage(

)
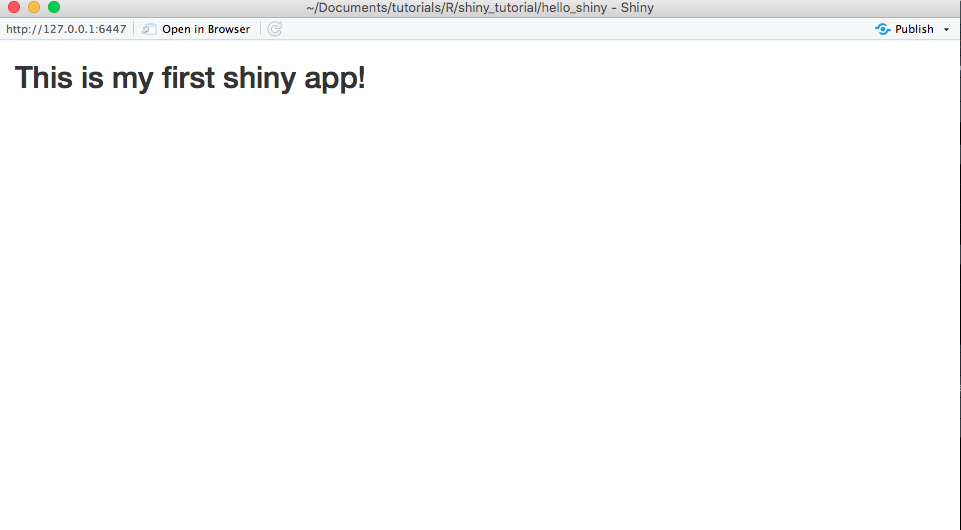
We can’t run this app yet because we don’t have a server function defined yet. Even if we did, it would just be a blank page. To add something to the page, we can add a simple header/title to the top:
ui <- fluidPage(
  titlePanel("This is my first shiny app!")
)Caveat: Most shiny functions are “Camel Case”, meaning that the second word in a two-word function is capitalized (e.g., fluidPage(), titlePanel()).
The Server
If you want to test your new creation yourself, define what the server should do (in this case nothing) by pasting the following code underneath the UI function:
server <- function(input, output) {
  ## Build how the app should react to the user/page here
}

shiny::shinyApp(ui=ui, server=server)
Then hit the ‘Run app’ icon. you should see your new app pop up in a new window. It should look like the following:

Crash course in HTML
What is happening “behind the scenes” when we call the titlePanel() function? Go ahead and run titlePanel("What is happening?") in the console and see what happens.
titlePanel("What is happening?")What is happening?
If you are familiar with HTML you will immediately recognize the output as a level two text header. In fact, many of the shiny functions are just convenience wrappers for html (or JavaScript). There are a number of these wrappers for defining text of different sizes:
library(shiny)
h1('Header1')
Header1
h2('Header2')Header2
#...
h6("Header6")
Header6
There are also a number of HTML “tags” that are built into shiny for text formatting aside from headers. You can get a full list of HTML tags by running:
names(tags)## [1] "a" "abbr" "address" "area" "article"
## [6] "aside" "audio" "b" "base" "bdi"
## [11] "bdo" "blockquote" "body" "br" "button"
## [16] "canvas" "caption" "cite" "code" "col"
## [21] "colgroup" "command" "data" "datalist" "dd"
## [26] "del" "details" "dfn" "div" "dl"
## [31] "dt" "em" "embed" "eventsource" "fieldset"
## [36] "figcaption" "figure" "footer" "form" "h1"
## [41] "h2" "h3" "h4" "h5" "h6"
## [46] "head" "header" "hgroup" "hr" "html"
## [51] "i" "iframe" "img" "input" "ins"
## [56] "kbd" "keygen" "label" "legend" "li"
## [61] "link" "mark" "map" "menu" "meta"
## [66] "meter" "nav" "noscript" "object" "ol"
## [71] "optgroup" "option" "output" "p" "param"
## [76] "pre" "progress" "q" "ruby" "rp"
## [81] "rt" "s" "samp" "script" "section"
## [86] "select" "small" "source" "span" "strong"
## [91] "style" "sub" "summary" "sup" "table"
## [96] "tbody" "td" "textarea" "tfoot" "th"
## [101] "thead" "time" "title" "tr" "track"
## [106] "u" "ul" "var" "video" "wbr"You can get details on what each tag does online, but some common ones include: - tags$b() bolds text - tags$br() inserts a line break - tags$div() adds a division, usually to be formatted in a specific way - tags$p() inserts a paragraph of text - tags$i() italicizes text - tags$img() creates an image
Caveat: Notice that the tags need to be superseded by tags$, but the header functions do not.
If we wanted to add some of these headers or tags to our app-in-progress, we would simply add them in our fluidPage() function followed by a comma:
ui <- fluidPage(
  ## Build what the person sees in the app here
  titlePanel("This is my first shiny app!"),
  h3("Oh hey, a level 3 header exists now"),
  p("Here is some text, but it is left aligned. Curses!"),
  tags$div(
    p("Centered text makes me feel better."),
    style="text-align: center;"
  )
  )
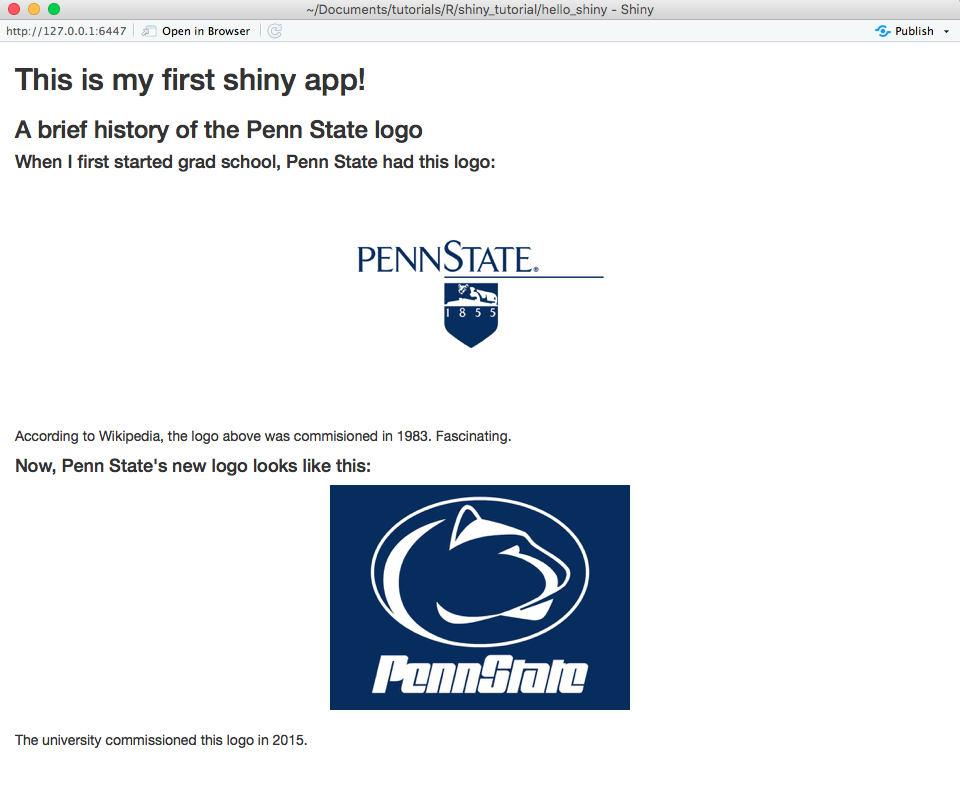
Intermediate exercise: Go back to the simple app with only a title. Can you use headers and tags to recreate an app that looks like this:

Hint: The tags$img() function takes src, width, and height arguments. You don’t have to supply both width and height. If only one is provided, the image will scale based off of the one argument. The src argument can be a URL or a path to a local image. For example:
tags$img(src='http://www.something.com/img1', width = 300)
If you want to compare the code you wrote to the code I wrote, or if you get stuck, take a look at the raw code here.
Shiny Gets Personal
Continue to part II of this tutorial where we will take this very basic app and make it more personal by asking the user for input, and supplying output based on it!
